Berries and Cream

Happy Labor Day!  If you’re able to be off and enjoy the holiday, yay!  If you have a party to attend, I’ve got some recipes for you – or even if you’re just chilling at home, you still gotta eat.  If you’re going to a USA themed party, check out my Red, White, & Blue Mini Trifles and Red & White Sweet & Salty Popcorn.  If you just want a fun snack to bring – or keep for yourself – try your hand at one of my simplest, go to recipes.

This recipe is truly so easy.  It is often my go to when people are over for dinner because it is a light, sweet addition to nearly any style of food.  I love that it only requires a few ingredients, and less than 10 minutes to whip up – literally!

Berries and Cream

serves 2

2C berries – I like tart berries for this recipe such as the blackberries and raspberries I used

2C heavy whipping cream

1/4C sugar

1/4t vanilla extract

1 lemon

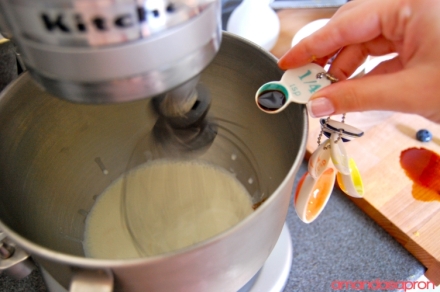
First, chill your metal mixing bowl and whisk in the freezer for about 15 minutes to chill.  As I learned recently from Kellie, this causes the whipped cream to be lighter since it maintains a chilled temperature throughout the whipping process.  The cream can easily be whipped by hand with a regular whisk, but I chose to use my Kitchenaid for this recipe.  Look how frosty it is!

While the bowl and whisk are freezing, wash all the berries and set them aside to dry. Then, zest the lemon.  I have had this recipe with lemon curd folded into the cream which is just as delightful – and significantly more lemony.  But the zest is a nice light touch that compliments the berries well.

Once the bowl and whisk are sufficiently chilled, pour in the cream and begin to whip on a low setting, if using a hand beater or Kitchenaid, or medium by hand.

Once the cream has begun to be whipped, slowly add in the vanilla,

sugar, and lemon zest.

Whip for several minutes until incorporated, or until the whip cream can stand on it’s own in nice peaks that curl over.

Be careful not to over whip – you do not want to create butter!  Look at this goodness.

Prepare berries in whatever bowls you’ll be serving them in.


Oh, blackberries!  Good thing I love you!

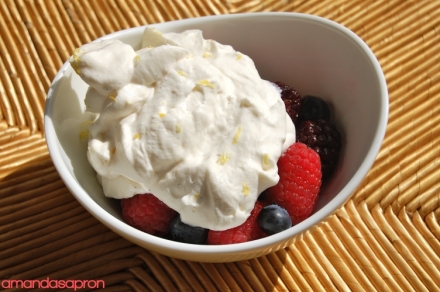
Serve cream over berries immediately. I chose to add a little more lemon zest on top for presentation.  So easy!

My food wanted to model.  The camera loves it!


Grain Free “Granola”


In my search for grain free options, I stumbled upon this idea.  I have attempted making granola bars before with various ingredients and have never found the right combination for a bar with a great consistency.  Or any consistency for that matter.  Every “bar” recipe I’ve tried before turned into mushy crumbles.  With some inspiration from around the internet and Pinterest, I was able to create this lovely “granola.”  Some pieces turned out to be bar like, but most of it turned out to be a great granola.  It has a great flavor, great texture, and knowing that I put only wholesome ingredients makes me feel really great about having this available for me and my husband to have something quickly available.  There is a lot of time required to make these – but it’s not a lot of hands on time, so pick a day off you have and make these while you do something else around the house.

The flavor is so ridiculous that I had to hide some to photograph because my husband was gobbling it up!  We ate it as a dry snack and with almond milk as a yummy cereal.  The first cereal that doesn’t go mushy! Lovit!!!

I based my recipe off of this one, and know that you could switch out any nuts and seeds for others if you’d like.

Grain Free “Granola”

makes about 4 cups

1C almonds

1C pecans

1/2C sunflower seeds

1C of golden raisins or various small dried fruit of choice

1C shredded coconut

1/2C maple syrup

1/4C coconut oil

1/2t salt

1/2t vanilla extract

a few dashes of cinnamon


First I put 3/4 of the nuts and seeds with the coconut in a food processor


and pulsed several times until it was a fine chop.

Then, I roughly chopped the remaining nuts and seeds and preheated the oven to 200 degrees.


Stir the two nut mixtures together with the dried fruit.  In a small saucepan over medium heat, melt the coconut oil with the vanilla, salt, cinnamon, and maple syrup.

Once the mixture begins to boil, promptly remove from heat…

and add it to the fruit & nut mixture.  Mix well with a wooden spoon.


Press into a pan lined with parchment paper.

Press into the pan well with the wooden spoon, greased fingers, or another piece of parchment paper. Set in the oven for 3-5 hours.  The time will be determined by how thick your mixture is in the pan.  If the mix hasn’t had time to dry out enough, it will be moist and crumbly.  A few hours into the dehydrating process, most of the mix will be bar-like if you’d like to make nut bars out of the mix.  Continue dehydrating to create crunchy “granola.”


Or like me, kick back with a bowl and enjoy!

Add a little almond milk.  So delicious!


Healthy Fruit Crisps

I feel like I have had an obsession with cherries and peaches lately.  And who can blame me?  It’s summer!  So I have allowed myself to entertain it and I started researching.  I knew I wanted to do a crisp, but I’ve been reading a lot lately about how grains are actually unhealthy!  Though I am not trying to be cynical, and may not be ready for a completely grain-free life, I am open to exploring new options and trying a few recipes to check it out.  I started with these crisps…and they were completely delicious!

I could not decide between the combination of cherries and blueberries or peaches, so I made both!  Even my husband loved them – hot and cold!

If you want to scar your idea of “healthy” whole grains, there are a lot of websites to read from, however, I like the way Katie writes about it here.  I “see the light” since I know a few people with celiac’s disease, so I try to cook gluten-free when I can, and this is further inspiration. Since I had to be creative and go grain-free, I got a lot of ideas from Kelly at Foodie Fiasco.  Here’s what I used.

Fruit Crisps

makes 4 servings – 2 peach and 2 blueberry-cherry

1 large peach

1 handful of cherries

1 handful blueberries

1/3C almond meal

1/4C shredded coconut

2T unsweetened applesauce

1t vanilla extract

1t coconut oil, divided

1t sugar, divided, optional

1/2t salt

Allow me to introduce you to rainier cherries.  If you have never had these, they’re worth the extra buck for a recipe such as these.  Compared to their darker cherry cousins, rainiers are lighter and sweeter and can only be described as golden.  They are definitely worth adding into your fruit basket!  Look at them!  They’re a blend of a lovely light yellow and pink.

Preheat the oven to 400.  After washing and drying your produce, cut the peach in bite size pieces and pit the cherries and slice them in half.  The rainiers are slightly larger than a normal cherry, so they were a bit difficult to maneuver into the cherry pitter, but it didn’t really bother me that the skins were a little scuffed up since they were cooked together with the blueberries and the scuffs weren’t noticed.

The original recipe called for shredded coconut.   Due to weird sensory issues from childhood, I don’t really love the texture of shredded coconut.  I decided to try to be an adult and try it, but I still chopped it up further so it was tiny pieces.

Meanwhile, I combined the almond meal, coconut, vanilla, salt, and applesauce which will serve as the healthy, gluten-free, sugar-free crisp topping.  Putting half the sugar and half the coconut oil in a pan on medium heat, let it melt.

Then I cooked the fruit in separate batches for 3-5 minutes each.

The blueberries will give off a blueish, purple juice, but don’t worry – since it’s not being cooked too long, the color doesn’t effect the light cherries too much.  Melting the other half of the coconut oil and sugar, I repeated this step with the peaches.

Separate the fruit into oven-safe ramekins.

Then top with the crisp topping.  Because this isn’t a traditional crisp with butter and flour, it will not be very crumbly.  I carefully and evenly placed the crisp topping onto each ramekin with my fingers and a fork.

Then baked for 20 minutes.  You’ll know they are ready when the fruit is bubbly and the crisp is lightly browned.  Cool for a few moments on a towel or cooling rack and serve.  For a non-vegan version, fresh whipped cream or even ice cream would pair well with these lovely crisps.  However, on their own they are a delicious, healthy treat and they showcase the delicious flavors of the fruit.  Despite the non-traditional ingredients in the crisp, I was pleasantly surprised with how crispy the topping turned out.  (And for all the coconut haters out there, you could probably up the almond meal if you wanted to ditch the shredded coconut.)  Here’s the peach crisp.

And the blueberry-cherry crisp.

I can’t decide which is my favorite!  They are both so good!

Oh, I’m sorry.  Did you want some?  Oops!

Strawberry Basil Bars

Oh, summer.  I love it!  It has been a busy, yet wonderful summer thus far!  Light summer desserts are one of my favorite things about summer and I cannot get over my obsession with the combination of strawberry and basil!  In March, some friends and I ran a 5K in St. Augustine and afterwards we treated ourselves to a gourmet popsicle shop!  (After a rewarding breakfast of fruit, pancakes, and potatoes!)  This popsicle shop, called the Hyppo was fairly new and had a line out the door!  We had to check it out.  They had several flavors to choose from, so of course I chose strawberry-basil!  It was the perfect combination in a not too sweet popsicle.  I will tackle trying to create my own version at some point this summer.  For now, I have these lovely goodies to eat!

I am a firm believer that if you have a friend’s Tupperware (or Gladware or Ziploc containers, etc.) they should be returned with treats!  I tweeted this a few weeks ago and got a container returned to me with Dove dark chocolate.  I had forgotten about that container, but was greatly delighted to receive it back – with the lovely contents.  I had accumulated two different friends containers so I decided to bake them a summer treat.  I found a recipe for strawberry bars and changed up a few thing to account for my own friends’ tastebuds.

Strawberry Basil Bars

makes about 24 bars

Adapted from allrecipes.com

1C sugar

1/2C butter or margarine, softened

1/4C mashed ripe banana or fruit purée of choice

2 eggs

31/4C flour, divided

1t lemon zest

1t baking powder

1/2t salt

1 dash of cinnamon

8-10 basil leaves

12oz strawberry jam

First, combine 3 cups of flour, the baking powder, cinnamon, and salt.  Then preheat your oven to 350.

Whisk dry ingredients together.

In my Kitchenaid, I creamed the butter, mashed banana, and sugar together, but of course this could be done in a bowl with a hand mixer.  This was somewhat of an experiment since I found out that banana can be a butter substitute.  Since I used the banana, I cut butter and sugar from the original recipe, but did not end of compromising on flavor.

Then added the eggs in, one at a time allowing the beater to incorporate each egg individually.

Add the lemon zest.

Then slowly add the flour mixture…

until the dough appears as big crumbles.

Set aside 1/4 of the dough-crumbs (about 1 cup,) then press the bottom of the remaining crumbs into either a 9×13 or 10×15 inch baking dish.  Greasing your fingers to press the crumbs helps tremendously.  So as not to brown the basil leaves, rip them into strips rather than cutting them, and spread them on top of the pressed dough.  (It’s ok if there are finger prints!)

Spread the strawberry jam on top.  If you’re really feeling adventurous and want to make your own strawberry jam, check out my first attempt here.

Finally, mix the remaining crumbles with the flour.

Work with your fingers until it looks about like this.

Then top the jam and basil mixture.  You want to keep this part crumbly, but you also want to make sure all your basil pieces are covered.  Exposed basil in the oven = black, burnt basil = no bueno.  It’s ok if some strawberry jam peeks through.

Bake in the oven for about 25 minutes and viola!  Crumbly, gooey goodness.  Seriously, they’re so good.  The bars aren’t too sweet, and the basil and strawberry combination shines!

Strawberry basil bars!!!  Eat liberally, or be a hero and give them to your friends.  And oh, yeah, Operation-Return-Tupperware was successful.

Peach Pancakes – Protein Style

We love breakfast at our house!  Even breakfast for dinner!  (Though some tired hours this means a bowl of cereal, but anyways…)  We also are working on our fitness so I’ve been trying to figure out how to sneak protein into everything!  I’ve made protein pancakes before – even vegan versions, but I decided to whip these up since eggs and Greek yogurt are notorious for their high protein.  They turned out pretty delicious!!!  And at about 100 calories, 13 carbs, and 12g protein each, you can indulge in several and not feel guilty!

I wanted to research, or as my husband calls it Google, what fruit naturally had high protein it.  Second to only the avocado was the peach!  I love peaches!  The house I grew up in had a peach tree in the backyard.  Many years were spent eating fresh, juicy peaches and canning them for the pantry and for friends.  Other years were spent trying to build squirrel deterrents and peach protectants because the little creatures would take one bite of the barely ripe peaches and hurl them to the ground.  But the squirrels never figured out if one peach wasn’t ripe then the rest weren’t either because there would always be a minimum of 20 peaches on the ground each with a bite missing.  At about 3g of protein per peach, I knew these would be the perfect addition to my protein pancakes.

Peach Protein Pancakes

makes 10 cakes

½C oats

½C milk of your choice, I used almond milk

3 scoops vanilla protein powder

1C Greek yogurt, I like Fage Total 0% fat version

3 egg whites

3 peaches or nectarines

3T maple syrup

½t vanilla

1 pinch sea salt

First I pulsed the oats in a small food processor to make an oat flour. I wanted the nutrition of the oats but not oat texture.  These could also be made low carb if you eliminate the oatmeal and milk, but you make have to play with the portions of egg whites to get the right consistency.

Then I added the oats, protein powder, salt, and yogurt to a mixing bowl.

Add the rest of the ingredients and mix well.  It should be a medium consistency, not too soupy.

Cut the peaches into thin slices.

Once your pan or skillet is preheated, you’re ready to prepare the cakes.

Nestle the peach slices into each cake, pushing them slightly into the batter so some covers the side of each slice.  If the slices are just placed on top, they’ll fall off on the flip side.

When the edges are thinned and cooked, the pancake is ready to flip – about 3 minutes on my 375 degree skillet.  They’ll take about 3 more minutes on the other side, or until it is equally golden on the other side.  Though it is tempting to keep checking them, with every lift, the peaches will loosen, so it is best to leave them a few minutes, then they will be finished.

They’re ready to eat alone, or with butter and syrup if you’re feeling brave!  I actually ate some cold on the way to a 5K yesterday.  The moisture from the fruit was enough that they didn’t even need syrup!